How can I edit pictures on the Mac? I hear you ask. There are a number of image editing software for Mac users so you should not have a problem finding something that suits your needs.
Need to edit photos on Mac? Today we’re going to take a look at a few different editing software that can help you out. It’s always fun and sometimes necessary to edit our photos. Whether it’s cropping, filters, or just simple edits we all need to make our photos look good and more memorable. I personally use Photos and preview apps for editing my photos but there is a slew of other great editing software out there that can do even more.
It’s easy to forget that you have powerful editing tools for your photos bundled with Mac operating system, but it’s true. Apple gives everyone the ability to edit photos and images right on their Mac without needing extra software, subscriptions, or purchases.
Macs are famous for their ease of use, and Photos is no exception. Anyone who can click on a picture ought to be able to copy, crop, and adjust an image with Photos without much trouble. But even the basic tools have enough power if you know how to apply them.
Want to edit the Image background? you can use this tool to edit and remove the Photo background.
Lately pictures seems to be more and more important. We take hundreds of photos a year and they are stored in our computers. But only a couple of them are used. We want that our photos look perfect and we edit them a lot. But what is the best software for editing images on OS ? This is the question I decided to answer, so here am I.
How to edit photos on Mac Using Photos app
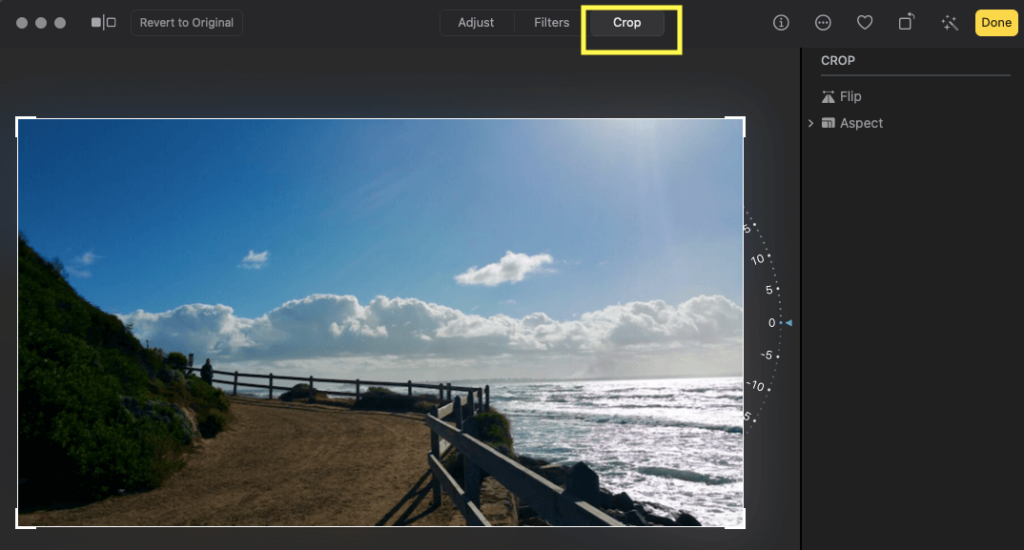
The Photos app that comes on every Mac allows anyone to edit pictures without going out and buying extra software. The thing is, there are so many things you can do with Photos, most newcomers don’t even realize it has basic photo editing tools like crop, black and white, split toning and more.
Also check out the best iPhone Camera apps and photo editing apps for iPhone.
Photos for Mac has tools that let you make quick corrections to photos, such as red eye removal and auto color correction. Advanced users can work with RAW images, edit layers, and control focal areas. Preview offers a photo editor with basic editing tools and the ability to apply filters to an entire image.
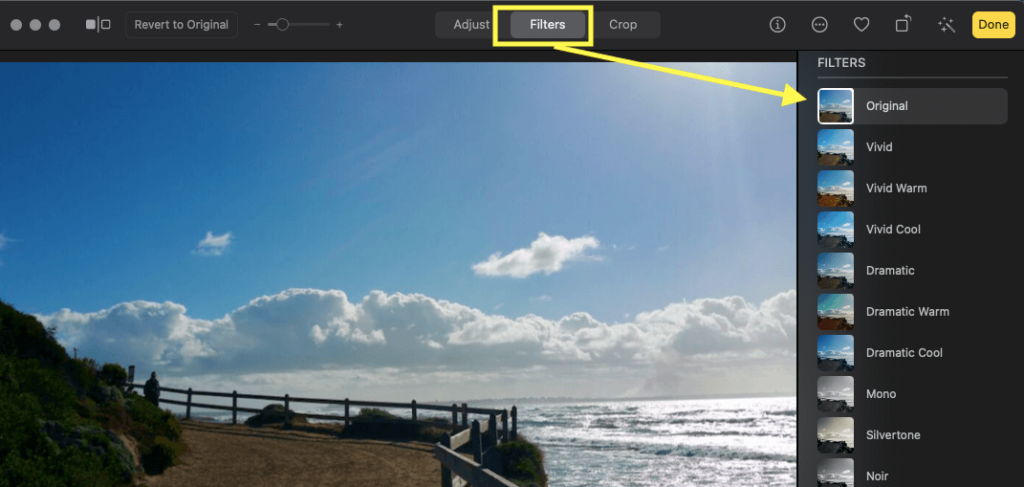
In this session, we’ll be teaching you how to do some basic editing on your pictures using the Photos app that comes with every Mac. We’ll cover adjusting the light and quality of a picture, sharpening or blurring out specific portions of an image, cropping and fixing red-eye, as well as adding filters to make a photo look more artistic.
Edit a photo or video
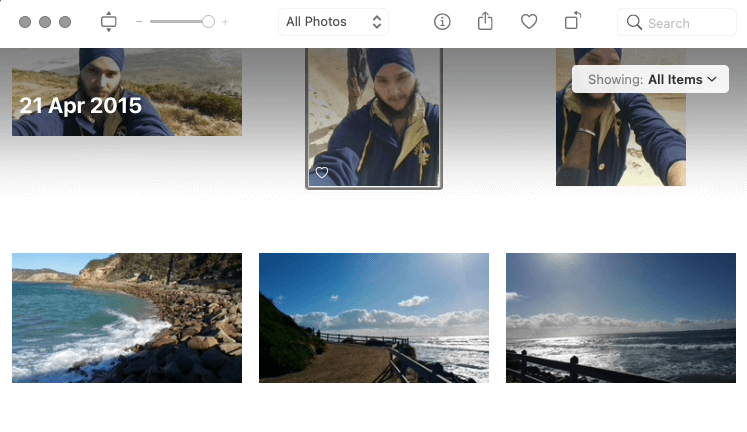
1. Open Photos app on your MacBook: Double-click a photo that you want to edit and click Edit in the toolbar (Can be seen on the top right corner).
2. Now you Can use the tools and different filters to edit the Photos:
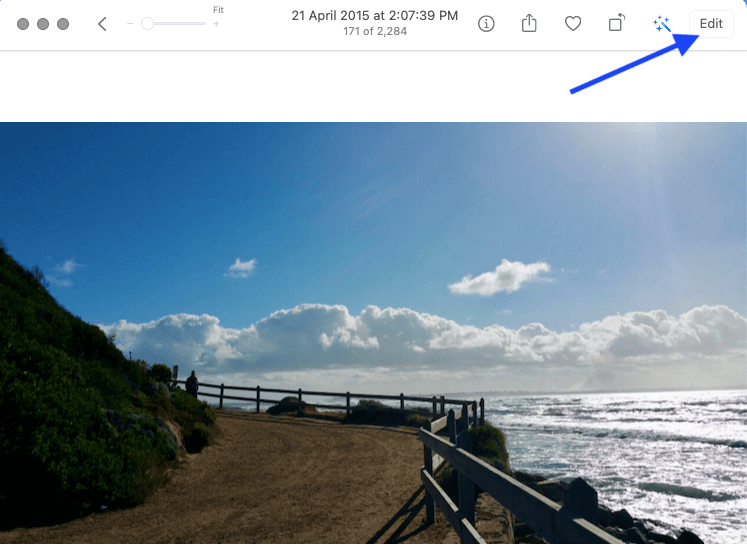
3. Zoom in or out on a photo: You can use the slider to Zoom in or out of the Photo while editing the image.

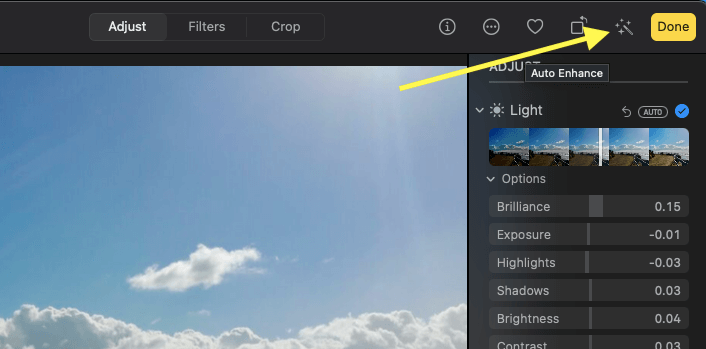
4. Click on the Adjust tab and then from the toolbar on the right side, you can select Light, Colour or Black & White exposure and more.
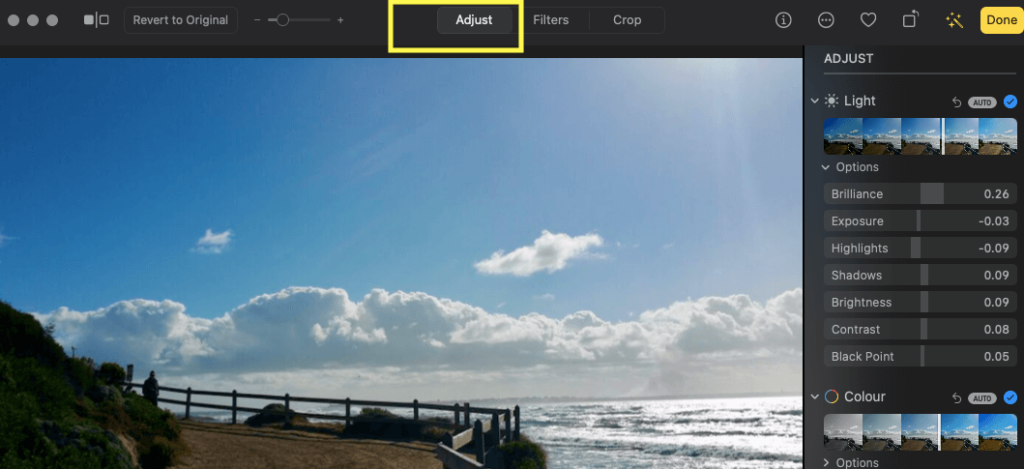
5. Adjust Light, Colour, White Balance, Retouch and clear Red-Eye using the Adjust tap on the top.
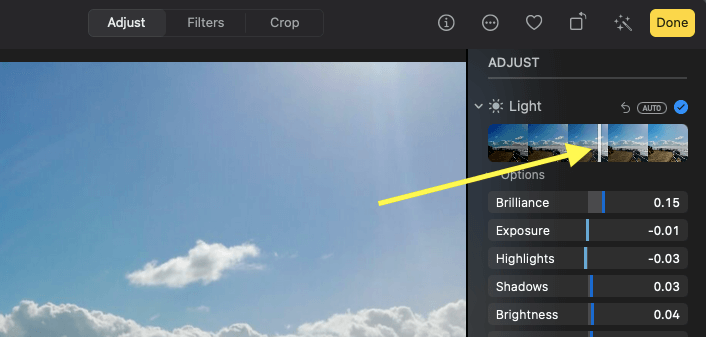
6. Just Click on any adjustment feature and move the slider forward and backward to increase or decrease the exposure until you are satisfied with the look of the image.
7. You can also use the auto-enhance feature of the Photos app to make auto colour and exposure adjustments.
It’s hard to know where to start editing photos on mac since there are so many different software options. Thankfully, with programs like Photos that make editing simple and even fun, it doesn’t have to be overwhelming.
How to edit photos on Mac Using Preview
Preview is built right into Mac; use the navigation palette to rotate and crop photos and flip them to correct perspective in just a few clicks. Preview, the program that comes with every Mac and is used to view PDF files, can also be used to resize images. Even though it might not seem obvious, Preview has some useful image editing tools built in. One of the easiest ways to use Preview to make image changes is to select an image and then open the Inspector panel on the right of the window.
- Open the photo with Preview.
- Got to Apple menu and Click Tools.
- Click Adjust Size.
- A new window will open, adjust the size of the Photo according to your preference by entering the sizes.
- Click OK and save the Photo or Image on Mac
You can adjust the colour of the image, add text, insert circles and arrows. You can annotate and add loupe and mask effects in picture from the tools menu.
It’s often helpful to be able to resize images on a Mac before using them in other programs and websites. While it may frequently get overlooked by the majority of users, Preview has the ability to edit pictures in many ways: resize, rotate, crop and more.
Conclusion
Take great looking photos with your iPhone or other smartphones with the Photo apps. By fully utilizing the power of your devices hardware, it gives you more control and the ability to produce high quality images with rich detail and vivid colors. And when you really need to get creative, Photo’s powerful editing tools let you remove red-eye, crop and straighten your pictures, remove distractions and add text or beautiful frames. All of this is made fast and easy thanks to an incredibly simple interface that lets you focus on what matters most, your pictures.
