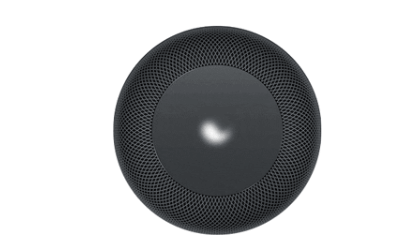
HomePod and HomePod mini are the revolutionary wireless home speakers that can seamlessly integrate into your home and make your life a whole lot easier.
Need a quick solution on how to set up homepod smart speaker, or how to use the HomePod? We’ve got you covered!
The latest version of Siri with HomePod has a lot more capabilities than before. It seems like you can get most things done with a simple voice command now, that wasn’t possible with Siri on iPhone before. With HomePod, using your voice is the only way to control it. You cannot directly touch or control it from the top.
In this post, We’ll cover the best uses of HomePod and Mini, they’re upgrades from the previous generations, their similarities and differences, tips for setting them up, and the benefits of each one.
How to set up HomePod or HomePod mini
Setting up a HomePod or HomePod mini is a straightforward process. Here are the steps:
- Plug in the HomePod or HomePod mini: Connect the power cord to the HomePod or HomePod mini and plug it into a power outlet. A white light will flicker and you will hear a chime sound.
- Turn on Bluetooth on your iPhone or iPad: Open the Settings app on your iPhone or iPad, tap “Bluetooth,” and turn it on.
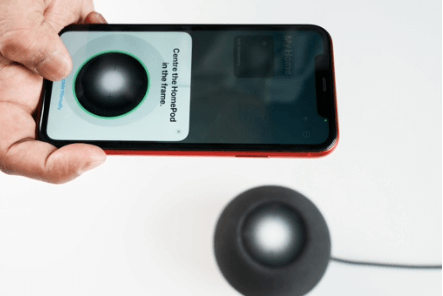
- Place your iPhone or iPad near the HomePod or HomePod mini: Make sure the two devices are close enough for the HomePod or HomePod mini to detect your device.
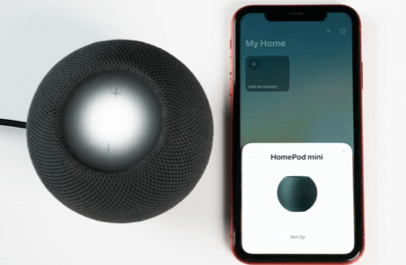
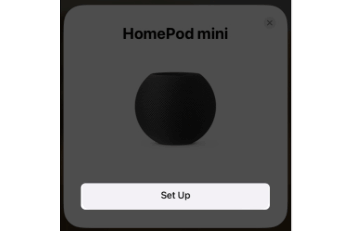
- Tap “Set Up” on your iPhone or iPad: The HomePod or HomePod mini should appear in the list of available devices. Tap “Set Up” next to it.
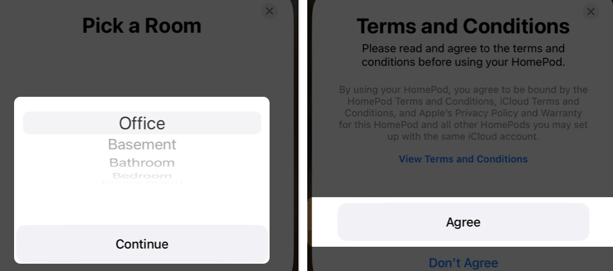
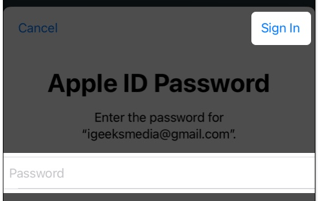
- Follow the on-screen instructions: You will be prompted to sign in with your Apple ID, choose the room the HomePod or HomePod mini is in, and set up Siri.
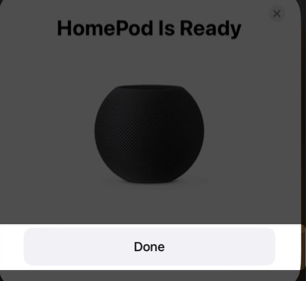
- Finish setting up the HomePod or HomePod mini: The setup process is complete once the HomePod or HomePod mini is set up and ready to use.
Once set up, you can use Siri to control the HomePod or HomePod mini, listen to music, ask for information, and more.
Connect HomePod to Wi-Fi
To connect your HomePod to a Wi-Fi network, follow these steps:
- Open the Home app on your iPhone or iPad: This app is used to set up and control your HomeKit accessories, including the HomePod.
- Tap the HomePod icon: You will see the HomePod’s details screen.
- Tap “Settings”: This will bring up the HomePod settings.
- Tap “Wi-Fi”: From here, you can select the Wi-Fi network you want to connect the HomePod to.
- Enter the Wi-Fi password: Type in the password for the Wi-Fi network you want to connect to.
- Wait for the HomePod to connect: Once the password has been entered, the HomePod will start connecting to the Wi-Fi network.
- Check the connection: Once the HomePod is connected to the Wi-Fi network, you will see a green dot next to the network name in the Home app.
If you need to change the Wi-Fi network that your HomePod is connected to, you can repeat the above steps and select a different network.
Note: Your HomePod must be connected to Wi-Fi to be able to access the internet and stream music, make phone calls, or control HomeKit accessories.
Know about status lights on HomePod
Here is a table to describe the different lights on HomePod and their meanings:
| Light Color | Meaning |
|---|---|
| White Pulsing | Ready to set up or an alarm/timer is active. |
| White Spinning | The device is turning on or updating software. |
| Red Spinning | The device is resetting. |
| Multi-colored Spinning | Siri is activated and listening. |
| Green Pulsing | A phone call is being transferred to the HomePod. |
| Orange Flashing (HomePod mini only) | The device is in ultra-low power mode. |
Differently stated, the table shows that the HomePod has different lights that indicate different things. For example, if the light is pulsing white, it means the device is either ready to be set up or an alarm or timer is currently active. If the light is spinning white, it means the device is turning on or updating its software.
The light turning red and spinning indicates the device is being reset. The multi-colored spinning light means that Siri is activated and listening. A green pulsing light means a phone call is being transferred to the HomePod, and an orange flashing light on the HomePod mini indicates that it is in ultra-low power mode.
HomePod Touch Control Functions
| Function | Description |
|---|---|
| Play and Pause | Tap the top of the HomePod to start or stop the music. |
| Adjust Sound | Use the (+) or (-) button at the top to increase or decrease the volume. |
| Next Track | Double-tap the top of the HomePod to skip to the next song when using a music player app. Double-tapping in the Podcasts app skips forward by 30 seconds. |
| Previous Track | Triple-tap the top of the HomePod to go back to the previous song when using a music player app. Triple-tapping in the Podcasts app rewinds the audio by 15 seconds. |
| Activate Siri | Use the voice command “Hey Siri” or tap and hold the top touchpad to activate the voice assistant. |
| Dismiss Alarm | Tap anywhere on the HomePod touchpad to turn off an alarm. |
Touch controls provide users with a simple and intuitive way to interact with the device. By tapping, double-tapping, or triple-tapping the top touchpad, users can play or pause music, adjust sound, skip tracks, activate Siri, or dismiss an alarm. This easy-to-use interface makes controlling the HomePod a breeze, allowing users to focus on enjoying their music or podcasts.
How to update HomePod?
To update the software on HomePod, follow these steps:
iPhone and iPad:
- Open the Home app on your iPhone or iPad
- Tap the three dots
- Tap Home settings
- Tap Software Update
- If an update is available, follow the on-screen instructions to install it.
Mac:
- Open the Home app on your Mac
- Click the three dots icon on the top right → select Home Settings.
- Click Software Update
- If an update is available, follow the on-screen instructions to install it.
macOS Monterey:
- Launch the Home app.
- Click the home icon.
- Select Home Settings.
- Pick Software Update.
- Click the Update button next to HomePod.
Note: Your HomePod must be connected to Wi-Fi and powered on in order to receive software updates. The update process may take a few minutes to complete, so it is recommended to keep your HomePod connected and powered on until the update is finished.
Here are the steps to update software on HomePod automatically:
- Make sure that your HomePod is connected to a power source and the internet.
- Open the Home app on your iPhone or iPad.
- tap three dots
- select Home Settings
- Scroll down and tap on “Software Update”.
- Toggle on the button next to HomePod.
- If an update is available, you will see a message indicating that a software update is ready to be installed.
- Your HomePod will automatically download and install the update overnight.
- The next time you use your HomePod, it will have the latest software version.
Note: Do not unplug your HomePod or turn it off during the software update. Doing so may cause issues with the update process.
Where should I place my HomePod for the best effect?
The HomePod was designed to be placed in the center of a room, so it can easily be heard from all angles. The best place for your HomePod is usually where you spend the most time in your home—you’ll get the best results if your HomePod is in a central location around which you and your family move. If you’re moving around the room, you can still adjust the volume or pause the music through voice commands.
Does the HomePod only work with Wi-Fi?
The HomePod, Apple’s new smart speaker, has some great features that set it apart from its competitors. It’s powerful and has great sound quality, but there are also some flaws that keep it from being perfect. One issue has to do with how the HomePod interacts with Wi-Fi. This is a little more nuanced than simply asking if the HomePod only works with Wi-Fi.
The short answer is that you can use the HomePod without Wi-Fi, but you’ll be limited in what you can do with the device. While there are Bluetooth options for pairing the HomePod to other devices (your phone, for instance), that’s not really ideal for most users.
Will a HomePod work without Siri?
If you disable Siri on your iOS device, you’ll be able to use the HomePod without having to use Siri commands. However, you’ll lose a lot of Siri-related features such as “Hey Siri,” messaging with your voice, listening to music through Apple Music, controlling HomeKit devices such as turning off lights or unlocking doors, and more. If you’d like to keep using those features, then no: you can’t use HomePod without Siri.
Wrapping Up
As I set up my HomePod and Mini, I found the process to be fairly simple. The Apple Home Kit app can be a bit overwhelming at first, but it helps with setting up your devices and organizing them within the app. The process was quick and painless, and so far the experience has been excellent.

